|
|
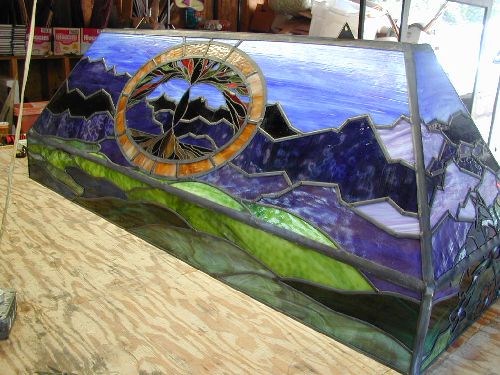
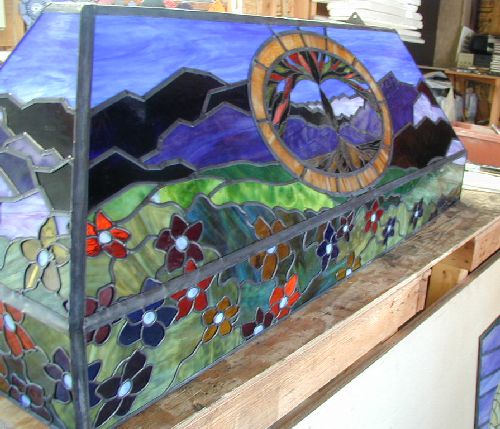
In the winter and spring of 2015, I built
this custom designed pool table light for a family in Columbus Ohio.
The clients had contacted some local stained glass studios, but were
turned down concerning this project. I can understand that decision
because this was like nothing I had undertaken before, and it required
figuring out how to create a one of a kind pool table lampshade that
would be both enduring and beautiful.
The design itself took many months to complete. The final drawings are
as you see here...

|
.
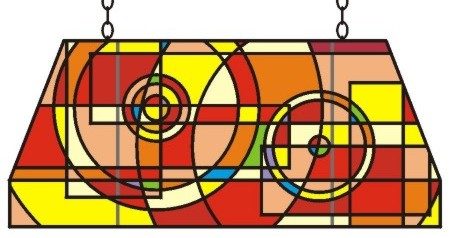
They
had originally wanted accents of blue, green and purple mixed in with
the yellows, reds and oranges that were the main color scheme (as in
the photo to the right). At the
last minute, I convinced them to leave out the blue and purple and go
with a
green accent that color-matched a green swirl in one of the
yellow-orange glasses. |
| . |
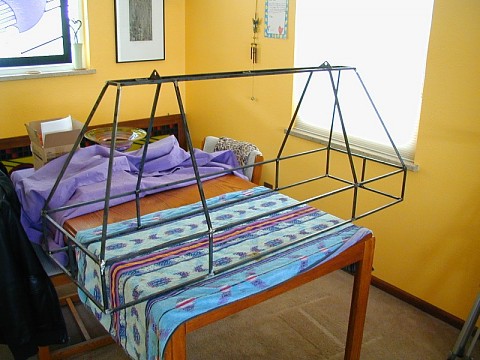
Constructing
this billiard table light began with figuring out the undercarriage
that would provide adequate strength to this large, heavy, fragile
artwork. I designed a steel framework to which I would afix the eight
stained glass panels. I contacted a local welding shop and the owner
suggested
that 3/8" square steel bars would be strong enough to support the
weight of lead and glass with minimal internal bracing. The result is
the frame you see to the right. |
| . |
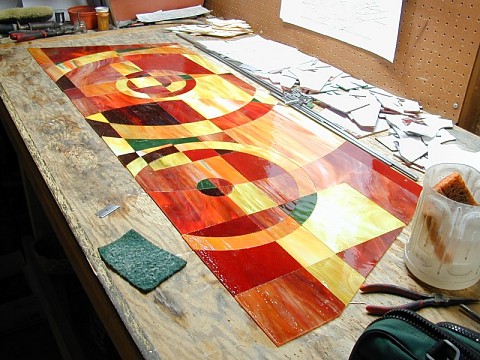
Construction of
this artwork required that I learn several new techniques. For example,
once the eight flat panels were completed,
attaching them to the steel frame required that I learn to solder
vertically. At one point, I found that if I moved the lampshade so that
1/3 of it was hanging off the edge of my work table, I could stand up
inside the shade. This made it possible to solder in place the
brass wires that hold
the stained glass panels tightly to the steel frame. |
| . |
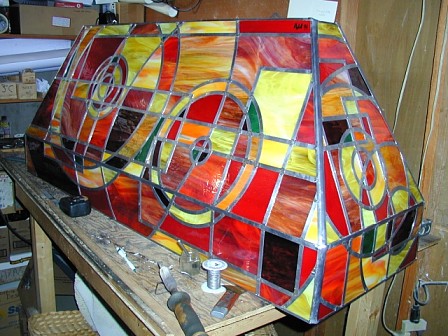 Here
you can see the completed
pool table lamp shade just prior to moving it off the work table for
the first time. To make it possible for two people to carry it, I
constructed special handles that attached to the hanging-points at the
top of the steel frame. These did not work well, so carrying it meant
lowering it onto a wood board and picking it up from
underneath.
In this way, my son and I were able to carry it out of my basement,
where I work in the winter months. Here
you can see the completed
pool table lamp shade just prior to moving it off the work table for
the first time. To make it possible for two people to carry it, I
constructed special handles that attached to the hanging-points at the
top of the steel frame. These did not work well, so carrying it meant
lowering it onto a wood board and picking it up from
underneath.
In this way, my son and I were able to carry it out of my basement,
where I work in the winter months.
The
original plan was to ship this artwork, and I have a lot of trust in my
usual shippers. But as I neared the end of this project, I decided that
I
wasn't 100% sure that my shippers would get this there unbroken, and
I'd
rather
drive it to Ohio than take the chance that the shippers might break it.
Breakage while shipping is rare and flat panels are not hard to fix,
but having to fix this lampshade would have been quite difficult as it
would have required removing panels from the frame, and that prospect
was even more mind-boggling than putting it together to begin with. So
driving it to
the client's home seemed the best way to ensure that it got there in
mint
condition, and the clients agreed. |
| . |
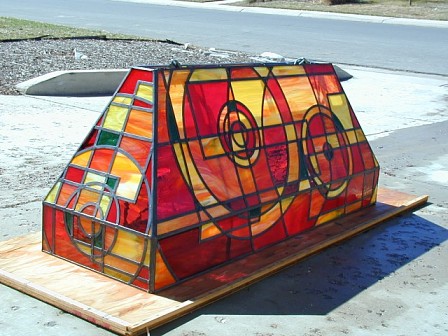
Here the artwork has been washed
and a chemical patina has been scrubbed on to darken the metallic
parts. Afterwards, I cut a new board for transportation that had wood
pieces screwed on to all four sides of the board so the artwork could
not slide around. Once my son and I loaded the lampshade into the back
of my van, I used ropes to tie it securely to the floor of my van. My
son helped me drive it to Ohio over his spring break, and we had a
great father-son road trip (thankfully I was driving when an 18-wheeler
didn't see us and forced us off the highway by changing lanes right as
we were passing it). |
| . |
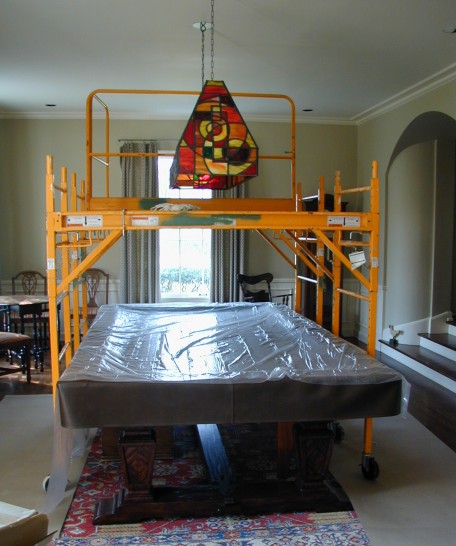
And here is the lampshade safely
hung over the billiard table. There is a photo my son took of me
sitting on the scaffolding inside the lampshade while I attached the
super-bright LED strips to the steel frame on the inside, but I
couldn't locate it.
The local electrician had some initial
problems with getting the LED lights to work so I had to return to
Colorado before I could get a photo of the
artwork all lit up, but the client assures me it all came out well in
the
end.
I will add a photo here of the lampshade lit up once the
clients send me one. And if I'm ever passing through Ohio again, we
have a standing invitation to stop in for a game or two...
INQUERIES ABOUT CUSTOM STAINED GLASS LAMP SHADES
I have gotten a lot of emails asking about custom stained glass lamp
shades. I end up spending time typing the same information and
attaching the same photos so I have decided to expedite that process by
giving that information here and uploading the relevant photos as well.
I have made six custom stained glass lampshades in the last 10 years.
They are not cheap, so if you were hoping that they would compete,
price-wise, with the mass produced stained glass lamp shades you can
find online, you will be disappointed. The lampshades I have made have
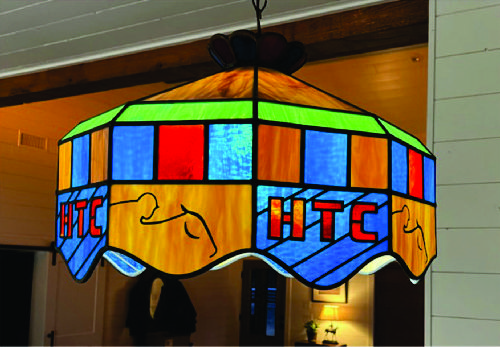
ranged in price from $1800.00 (the HTC lamp shade seen in the photos
below) to $8500.00 (the Clemson football lampshade seen in the
photos below). And those prices are just for the lampshade;
shipping costs and lighting costs and hanging costs (including
optional reinforcement of the ceiling so that it will support a heavy
lamp shade) are additional, which could make a custom shade top out at
as much as $12,000.00.
The larger shades are made on a steel frame made for me by a local
welder. See the photos above to understand how this works. The smaller
(HTC) shade has steel reinforcement bars soldered up high on the
inside, but no steel frame. The round lamp shade (HTC) was made by a
little-known process whereby the conical sections are made flat, then
bent into the round shape due to the softness and flexibility of lead
(Pb) came. I was taught this method when I was a teenager by the uncle
who got me started in stained glass and just happened to take a class
in stained glass by an old master who knew this technique. Another,
better example of this technique is the lamp shade I made for my
parents when I was about 20 years old; it can be seen here.
Only two of the six lamp shades are shown on individual web pages on my
web site because [1] clients often send photos that are not good enough
to post online or [2] clients do not send photos at all. For that
reason, most of the photos below show lamp shades prior to being hung.
BRONCOS
STAINED GLASS LAMP SHADE
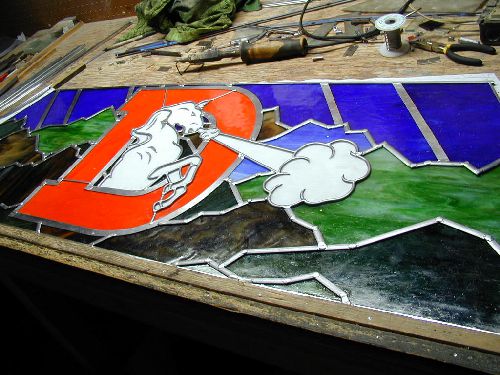
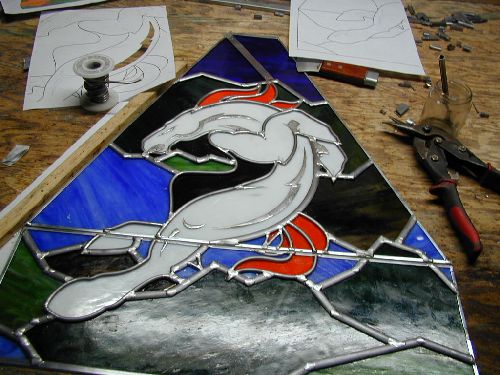
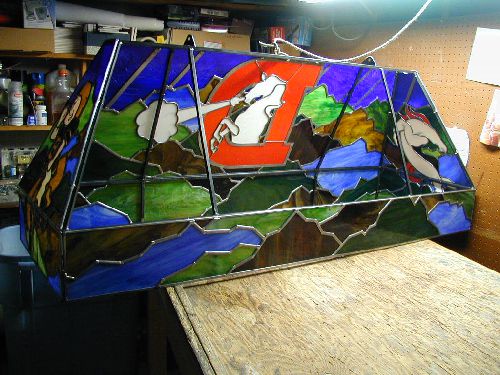
I'm not sure why, but I could not find a photo of this Broncos lamp
shade completed. The photos below show the lamp shade during the making
process.
CLEMSON
UNIVERSITY STAINED GLASS LAMP SHADE
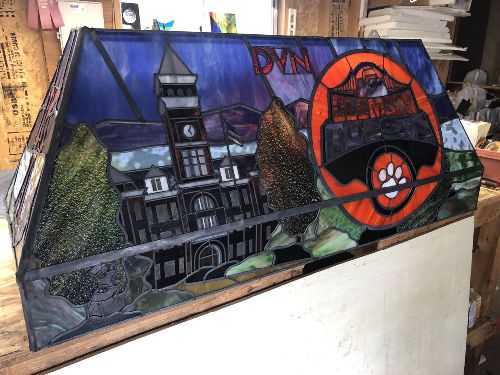
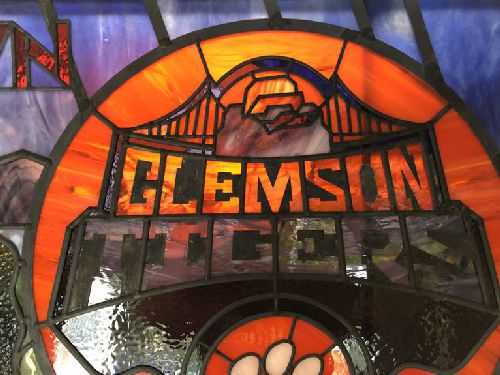
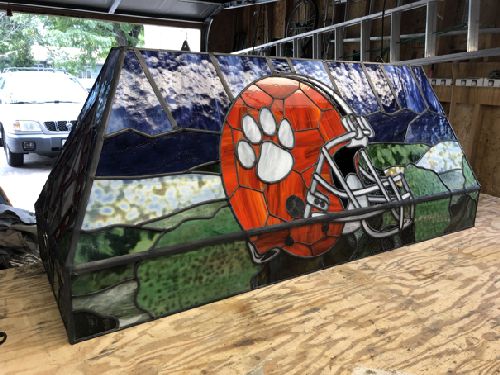
Each lampshade can be personalized to suit the client's desires. This
client is a man who attended Clemson University. The lampshade not only
incorporates iconic images of the Clemson Tigers, it also has one of the main
Clemson University buildings in the design. I could not find photos of
the ends of this lamp shade, but the designs on both ends are icons of
Kappa Alpha Psi, the fraternity that this client was a member of during
his academic years. I don't recall what the letters "DVN" meant, but
they, too, were meaningful to the client.
DOUBLE
WOOD FARM STAINED GLASS LAMP SHADE
This lampshade incorporated a corporate logo into the design.
HIGHLANDER
TRAINING CENTER STAINED GLASS LAMP SHADE
This lampshade was hung over a dining room table.
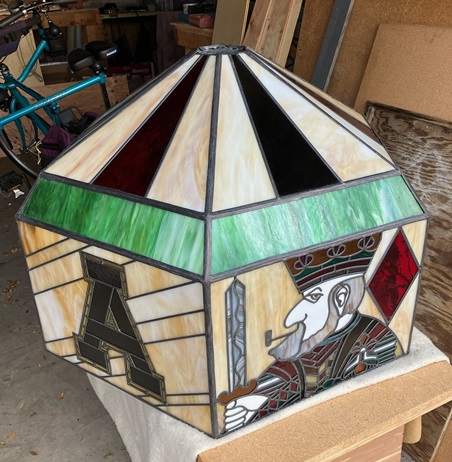
HEXAGONAL LAMPSHADE FOR A POKER TABLE
Shown prior to shipping.
 |
Return to the gallery 
|